Dockerize your Rust App with Spheron Compute
Learn how to dockerize your Rust App with Spheron Compute


Table of contents
Do you know what a "dock" is? In the sea, it's an enclosed area where ships are loaded, unloaded, and repaired. In software development, "dockerize" has a different meaning.
This step-by-step guide will walk you through the process of deploying a Rust app on Spheron Compute using Docker. Docker allows us to package our Rust application into a container, which can be easily deployed and managed on Spheron Compute for seamless hosting and scaling.
Prerequisites:
To follow this guide, please have the following in place:
Basic understanding of Rust.
Docker account and familiarity with Docker concepts.
Spheron account - you can sign up here!
Text editor - Visual Studio code or your preferred one.
Dockerization, Rust, and Spheron
Dockerization is the process of creating a Docker image containing your app and its dependencies. Think of it as when you're travelling to a different country, you gather all the essential items you need for your trip. This helps you easily move them from one place to another.
The Docker image can then be run in an environment that has Docker installed. It ensures portability, consistent behaviour and easy deployment of your app. Read more about Dockers here.
Rust is a versatile programming language used for a wide range of applications, from building backend systems and network services to developing web browsers and game engines.
If you're building applications with a focus on safety and performance, then Rust is your sure plug.
Spheron is a decentralized cloud platform for deploying and hosting web and dapp.
Spheron compute is a feature of the Spheron platform that specifically caters to the hosting and execution of applications.
It leverages the power of decentralized networks to provide benefits such as improved security, resilience, and cost-efficiency.
How to Dockerize your Rust App with Spheron Compute
Step 1: Create a Rust App
On your PC, Mac or Linux, create a project folder (give it a cool name) and open it in your favourite code editor. Here, we are using VS Code.
In the terminal, create a new Rust app using the following command:
cargo new my-rust-app
This will create a new directory in the project folder, named my-rust-app with the basic structure of a Rust app. Replace my-rust-app with the name you want.
Step 2: Write Your Rust Code
Open the main.rs file in your text editor and write the code for your Rust app.
You can use this code as a starting point:
fn main() {

println!("Hello, Spheron!");

}
Save the file when you're done.
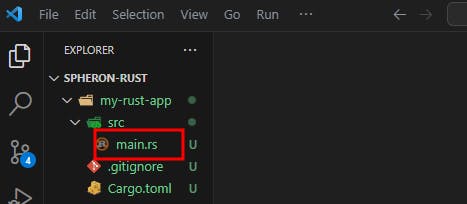
At this point, your project folder should look like this:

Step 3: Create a Dockerfile
Next, create a Dockerfile (without an extension) in the root directory of your Rust app. The Dockerfile contains instructions for building the Docker image for your app. Open a text editor and create a new file named Dockerfile, then add the following content:
# Use the official Rust image as the base image

FROM rust:latest

# Create a new directory for the app

WORKDIR /usr/src/my-rust-app

# Copy the app files into the container

COPY . .

# Build the app

RUN cargo build --release

# Set the entry point command

CMD ["./target/release/my-rust-app"]
Save the Dockerfile when you're done. You'll see it added as shown below.

Step 4: Build the Docker Image
Open a terminal or command prompt, navigate to the root directory of your app (where the Dockerfile is located), and run the following command:
docker build -t my-rust-app:latest .
This command builds the Docker image using the specified Dockerfile and assigns the tag my-rust-app:latest to the image. Make sure to include the dot (.) at the end, as it indicates the build context.
Step 5: Push the Image to Docker Hub (Optional)
If you want to push the Docker image to Docker Hub or any other container registry, follow these steps:
Log in to your Docker Hub account using the command
docker login.Tag the Docker image with your Docker Hub username and repository name using the following command:
docker tag my-rust-app:latest <your-docker-username>/my-rust-app:latest
- Push the tagged image to Docker Hub using the following command:
docker push <your-docker-username>/my-rust-app:latest
Step 6: Deploy on Spheron Compute
Log in to your Spheron account and click on Start with Compute to deploy your Rust app.
Click on New Cluster to create a new cluster.
Select the Import from Docker Registry option, and fill in the Name, Image and Tag fields.
 💡Name: Choose a unique name for your deployment. It should be a name that helps you identify the purpose of your Rust app.💡Image: Next, enter the image of your Docker container. This refers to the name of the Docker image you pushed to Docker Hub. In our case, the image name is
my-rust-app.💡Tag: The tag represents a specific version or configuration of your Rust app. For our sample application, you can use a tag likev1.0ordemo. This ensures that the correct version of your Rust app is deployed.Select instance plan: Choose the appropriate plan for your Rust app.
Configure port mapping: Specify the container port and the exposed port.
Set environment variables: Add any required variables, including secret keys.
Choose deployment region: Select your preferred region or leave it blank for automatic deployment.
Advanced configuration: Customize additional settings if needed.
Click Deploy: Initiate the deployment process.
Conclusion
And that's all there is to it!
You have Dockerized and deployed your Rust app on Spheron Compute using Docker. This allows you to easily manage and scale your Rust application in a containerized environment.
Additional Resources
Read the Spheron documentation for further information.