How to Achieve Concurrency in Go
Concurrent Programming in Go

Code👨💻, words📝, and rhythm🥁 - my trifecta
Concurrency is one of the top goals software developers aim to achieve in their applications.
It's the art of dealing with many tasks at the same time, enabling smoother and more efficient execution of your code.
In contrast, parallelism involves executing multiple tasks simultaneously.
Rob Pike, one of the founders of Go, in his 2011, Concurrency Is Not Parallelism talk mentioned that - "Concurrency is about dealing with a lot of things at once, Parallelism is doing a lot of things at once."
Concurrency is about Structure: It focuses on organizing tasks and managing their execution in a way that maximizes efficiency and responsiveness.
Parallelism is about Execution: It involves executing tasks in parallel, making use of multiple CPU cores.
Go is a programming language that is designed with concurrency in mind. This article will shed more light on the concept of Concurrency in Go, and how to apply it in your Go applications.
Goroutines
Goroutines are lightweight versions of Threads, that enable the concurrent execution of functions.
They're a key feature that sets Go apart from many other programming languages when it comes to handling concurrency.
Goroutines allow you to efficiently utilize the available CPU cores and handle tasks concurrently without the overhead of traditional threads.
Here's an example:
package main

import (
    "fmt"
    "time"
)

func main() {
    go count("goroutine")
    count("main")
}

func count(tag string) {
    for i := 1; i <= 5; i++ {
        fmt.Println(tag, ":", i)
        time.Sleep(time.Millisecond * 500)
    }
}
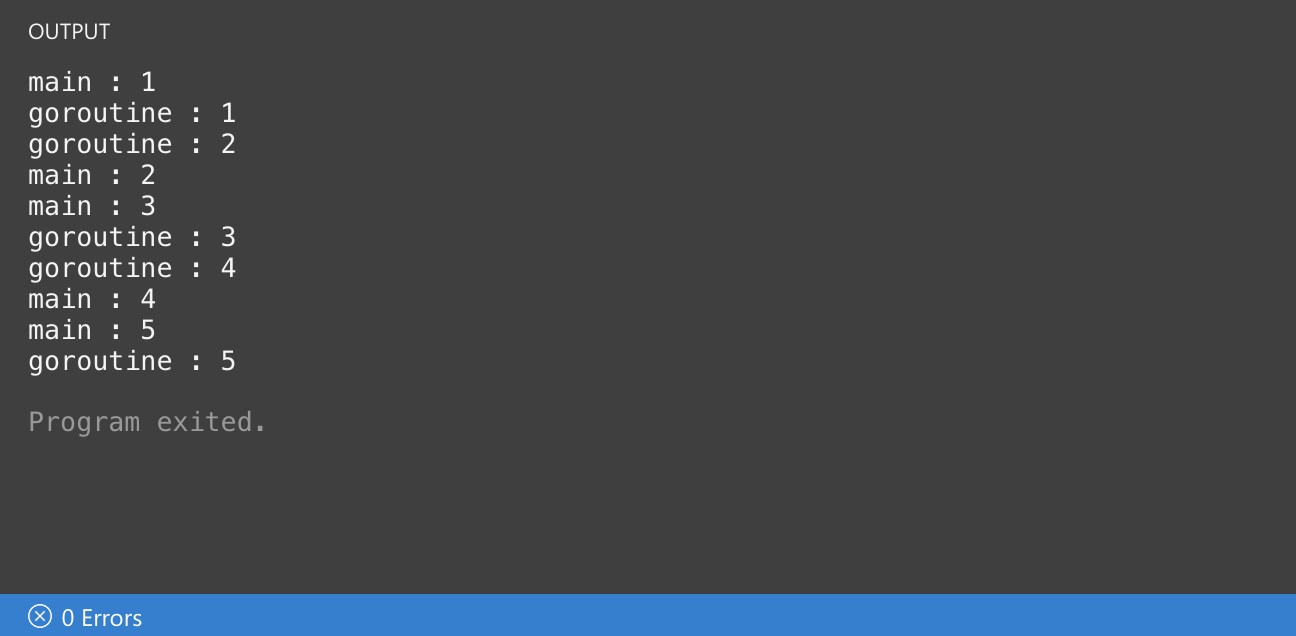
In the code snippet provided, we're demonstrating how to use Goroutines in Go. Goroutines are like lightweight threads that can run independently and concurrently.
They are a key feature of the Go language for handling multiple tasks simultaneously.
Here's what the code does:
We define a main function, which is the entry point of our program.
Inside the main function, we launch two functions concurrently using Goroutines. The first one is count("goroutine"), and the second one is count("main").
Both of these functions print numbers from 1 to 5, along with a tag indicating whether they are running in a Goroutine or the main program. They pause for half a second between each number using
time.Sleepto simulate some work.
As a result, when you run the program, you'll see that the numbers from the Goroutine and the main program will be interlaced, showing that they are executing concurrently.
To run the code, open your favourite text editor, and create a file named goroutines.go, enter the code and run with this command below in your terminal:
go run goroutines.go
Advantages of Goroutines over Threads
Lightweight: Goroutines are more lightweight than traditional threads, making it possible to create thousands of them without significant overhead.
Efficient Resource Management: Goroutines are efficiently managed by the Go runtime, which automatically schedules and scales them across available CPU cores.
Concurrent Programming Made Easy: Goroutines simplify concurrent programming by abstracting away many of the complexities associated with traditional multi-threading. They allow you to focus on the tasks you want to perform concurrently rather than managing threads explicitly.
Now that we've learned about Goroutines, let's move on to the next important concept in Go, which is Channels.
Channels
It is safe to assume that the concept of concurrency is registered in memory by now... You will need it stored in cache for easy access, we will be talking a whole lot about it.
What are channels? Channels in Go is Go's way of making concurrency easy, it is her way of allowing goroutines to talk to each other.
N/B:
channels are typed (can either be an integer, a string or some other type).
channels are unbuffered by default (it cannot hold data in transit - we will discuss this in this article)
We will look at the practical use of a channel shortly but before then let's discuss the two types of channels you will encounter.
First on my list is the bi-directional channel: this type of channel permits data to be both entered and retrieved (you can both put and take out of it). bi-direction channels can be created using the make method like below:
done := make(chan string)
//notice that there is no arrow pointer and there is a type
The second channel type we will be discussing is the one-directional or single-directional channel: Now unlike the bi-directional channel, this channel can only permit you to either take data from it or put data into depending on its initial definition, Let's see how this works in practice.
chan<- int
data can only be sent to the channel above

<- chan int
data ca only be received from the channel below
Unbuffered channel Remember we said earlier that go channels are unbuffered by default right (incapable of holding data in transit)? perfect! let's talk about that!

The default capacity of a channel is zero meaning this;
In the image above we have two tasks (a and b) that depend on channel c. Task a writes to c while task b reads from c. In this scenario, task a will block after writing to c (will not continue) until task b reads from c and vice versa. If it does not do this, channel c will lose the data stored in it since it cannot hold any data.
this feature can serve as a waitgroup/sync hack
You can use the cap() inbuilt function in Go to check the capacity of a channel.
cap(chan)
//you must pass in a channel as the param to the function
Buffered channels Channels that can hold data in transit are called buffered channels and are defined in go this way:
c := make(chan int, 5)
//note the second parameter i passed in, that is the buffer size i wish to assign to this channel
What is the implication of giving a channel a buffer size? This would mean that the channel will only block when the capacity is full, in the case of the example channel c with a buffer size 5 above, I can send to this channel 5 times without receiving it before it blocks. After the 5th send, the channels block until the receiver receives it. This also means that the receiver can only block after it has done 5 receiving.
Practical examples
Let's say we manage an eatery in town, and on our payroll, we have a chef who is responsible for preparing different delicacies we as well have waiters who listen to the chef to know when a particular order is ready to be served; to implement this we might want the chef to ring a bell once an order is ready to be served.
chefs.go
package main

import (
    "fmt"
)

func main() {
    // We want to know the first chef to be done cooking, so we create a done channel.
    // Once we receive a done signal, the cookathon is over.
    done := make(chan string)

    // We ask our chef to commence cooking and we pass the chef access to the done channel.
    go cook(done, "Chef A")

    // Once any output is received on this channel, print it to the console and proceed.
    fmt.Println(<-done)
}

// This function now accepts a channel as its first argument...
func cook(done chan string, chef string) {
    fmt.Println(chef, " is cooking")
    done <- chef
}
In the above scenario, it is safe to make the activities of the chef a goroutine, We created a channel called done (this acts as the button/bell we discussed earlier). The chef will ring the bell or push the button whenever the chef is done cooking.
Now let's look at an example that illustrates achieving synchronization with channels:
chef_waiter.go
package main

import (
    "fmt"
)

func main() {
    done := make(chan string)
    food := make(chan string)
    served := make(chan string)

    go cook(done, "Chef A", food)
    go serve(food, served)

    fmt.Println(<-done, "is done cooking")
    fmt.Println(<-served)
}

func cook(done_ chan string, chef string, food chan string) {
    fmt.Println(chef, "is cooking")
    done_ <- chef
    food <- "Noodles"
}

func serve(food chan string, served chan string) {
    fmt.Println(<-food)
    served <- "Waiter is done serving"
}
Here we have three channels declared in our main function - done, food and served. The main function cannot execute the fmtPrintln() function on the done and served function unless the goroutines serve and cooked are done executing and the corresponding channel receives data. This is a good example of using channels to achieve synchronization.
Select Statement
Channel Blocking
I believe this concept should be reiterated before we continue; How does this work? let's say we have a cube that fits in a square hole.

The amount of cubes the square hole can take is the square hole's buffer size, if the square hole is full, no more cubes can be entered; this is what we refer to as blocking. Let's say the channel is the square hole and the data it holds is the cube, You might attempt to put in a value in a channel that can no longer take a value unless what is put in it is taken out at this point, the program will throw an error because the channel is blocked, the other way round; you might want to take data out of an empty channel, when this happens also the channel blocks and the program throws an error.
Select statement
This is a way of handling go channels to avoid a block situation, just like your switch statement the select statement executes a block of code if a condition is met. In the case of channels, select is used to listen in on channels (multiple) to carry out an action on whatever channel data is sent on first or whatever channel data is received first. Let's paint a picture;
package main

import "fmt"

func processInput(c chan int, quit chan int, ui int) {
    if ui == 1 {
        c <- 1
    }

    if ui == 2 {
        c <- 2
    }

    if ui == 3 {
        quit <- 1
    }
}
func main() {
    c := make(chan int)    // channel for name
    d := make(chan int)    //channel for gender
    quit := make(chan int) //channel for quit
    user_input := 1        //we simulate user input here
    go processInput(c, quit, user_input)

    select {
    case <-c:
        //do name
        fmt.Println("Processing name")
    case <-d:
        //do gender
        fmt.Println("Processing gender")
    case <-quit:
        //exit application
        fmt.Println("you quit the application")
    default:
        // system did not understand user's input
        fmt.Println("Invalid input")
    }
}
Let's dissect the above example; when a user submits an entry, we process the input to put data into the appropriate channel, and in the select statement, we print out the action being carried out.
Lastly, if the input does not match the predefined data we fall back to the select default block.
Mutexes and Locks
In concurrent programming, managing shared resources is critical to avoid data races and ensure data consistency. Go provides a mechanism for this using Mutexes (short for mutual exclusion) and Locks.
Mutexes are synchronization primitives used to protect shared data.
They allow only one Goroutine to access a critical section of code at a time, ensuring that multiple Goroutines don't modify shared data simultaneously, which could lead to data corruption or unexpected behaviour.
An example of Mutexes in Go:
package main

import (
    "fmt"
    "sync"
)

var (
    counter int         // Shared counter variable
    mutex   sync.Mutex // Mutex for synchronizing access to the counter
)

func main() {
    var wg sync.WaitGroup // WaitGroup to wait for all Goroutines to finish
    for i := 0; i < 5; i++ {
        wg.Add(1) // Increment the WaitGroup counter for each Goroutine
        go increment(&wg) // Launch Goroutines to increment the counter
    }
    wg.Wait() // Wait for all Goroutines to finish
    fmt.Println("Final Counter:", counter) // Print the final counter value
}

func increment(wg *sync.WaitGroup) {
    defer wg.Done() // Signal that the Goroutine has finished
    mutex.Lock()   // Lock the critical section to safely modify the counter
    counter++      // Increment the counter
    mutex.Unlock() // Unlock the critical section
}
In the code above:
We import the
"fmt"package for printing and the"sync"package for synchronization, including Mutexes.We declare a shared variable called
counterand introduce a Mutex namedmutexto control access to it.In the
mainfunction, we employ async.WaitGroupto ensure that all Goroutines finish their tasks before displaying the finalcountervalue.Inside the
incrementfunction, we usemutex.Lock()to secure the section of code where thecounteris incremented. This guarantees that only one Goroutine can alter thecounterat any given moment.We use
defer wg.Done()to inform thesync.WaitGroupthat the Goroutine has completed its task.
When you run the Go program above, here's what happens:
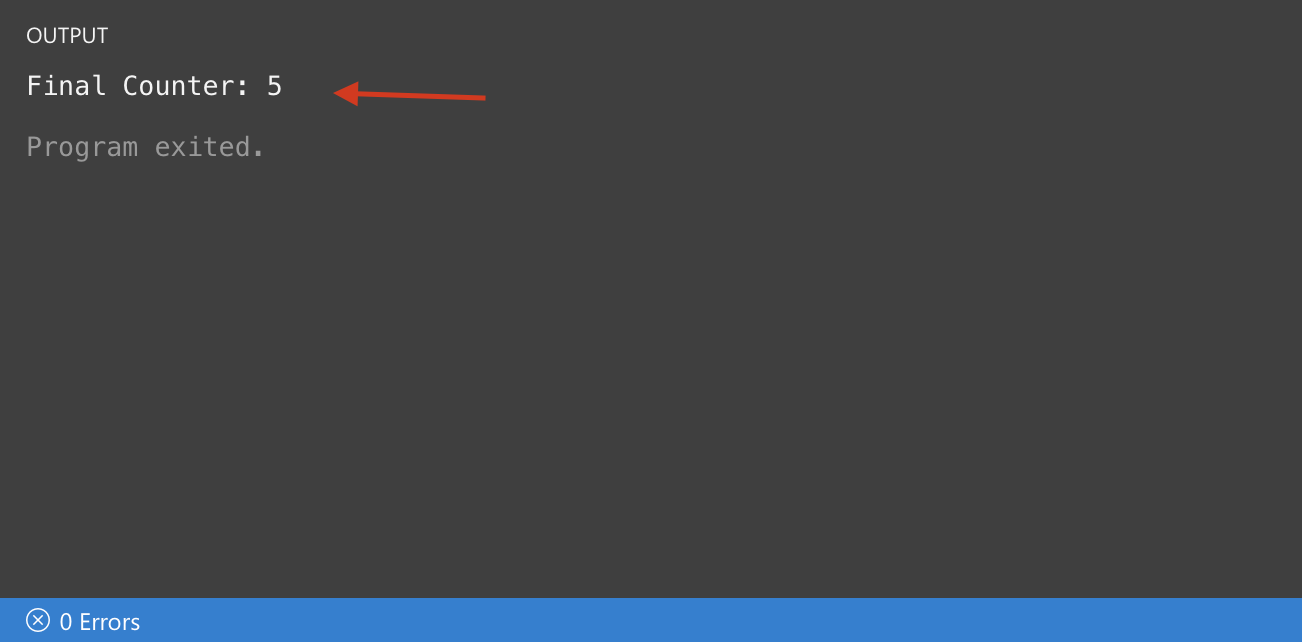
The main function launches 5 Goroutines concurrently, and each of them increments the shared
countervariable by 1.Since there are 5 Goroutines and each increments the counter once, you get a final counter value of 5 when they all complete.
The mutex ensures that each Goroutine has exclusive access to the
countervariable while incrementing it, preventing race conditions and ensuring the correct final result.
Using Mutexes and Locks, you can safely manage shared resources and prevent data races in your concurrent Go programs.
Conclusion
Go was designed with concurrency in mind from the very beginning. It's a language that excels at building scalable and responsive software systems.
To truly experience the applications of concurrency in Go, there's no substitute for hands-on experience. We encourage you to practice, research and build programs.
Thanks for reading :)


